WSL2を使ってffmpegをソースからビルドする
世の中には様々な方々が作成した便利なツールで溢れていますが、こと動画や音声については殆どのツールがffmpegをベースに作成されていると言っても過言では無いのではないでしょうか。
ffmpegというのはざっくり言えば動画や音声のあれこれをできるようにするソフトウェアなんですが、自分は専ら変換用のツールとして使ってます。
ffmpeg自体はコマンドラインツールなので自分でコマンドを組み立てないとなんですが、結局自分のわがままをそのまま受け入れてくれる用途になるとこれが一番なんですよね。
で、本題なんですが、今回はこのffmpegをWSL2上でビルドし、Windows用のバイナリファイルを作ってみます。
今回では一応ffmpegのgitに上がっているmasterレポジトリバージョンのバイナリを作るという前提で進めます。
この記事の目次
経緯
通常の用途であれば公式で配布されているWindows用のバイナリファイルをDLすればいいだけなんですが、例えばlibfdk_aacの様なライセンス上の問題で通常のバイナリファイルに含まれていないライブラリを使いたい、というのが発端です。
libfdk_aacは音声コーデックの一つであるAACにエンコードしてくれるライブラリですが、ffmpeg自体にもNativeAACエンコーダが含まれているのでただ単にAACにエンコードするだけなら不要です。
ただ、このNativeAACの評価があまり良くないようで、どうせなら高品質なAACエンコーダを使いたい、それだけです。
NativeAACでも問題ないと感じるなら、正直ちょっと面倒な作業になるので今回の作業はやらないほうが良いかも。
※と言うよりPC、特にLinuxに詳しくないとエラーで詰まるかも
手順
ここからは実際にWSL2を使ったffmpegのビルドをやってみます。
WSL2で使う環境はUbuntuにしています、本当は慣れたAlmaLinuxでやりたかったんですが上手くいかなかったので……
※以降はWSL2を導入済みの前提で話を進めるので、WSL2の導入のやり方についてはググってください
Microsoft StoreからUbuntuを入手する
まずはビルドに使用するWSL2環境を用意します。
正直な話Debian系はあまり使ったことが無いので本当はRedHat系ディストリビューションにしたいんですが、色々と試した結果上手くビルドできなかったのでUbuntuが一番手っ取り早いです。
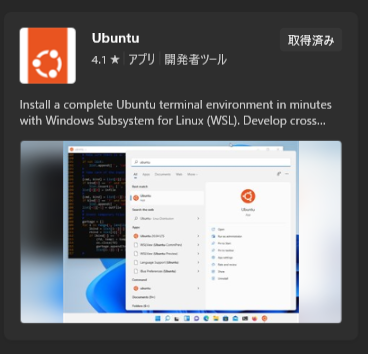
Microsoft Storeで「Ubuntu」と調べれば出てくるので、バージョンの書いてないやつをインストールすればOKです。
Microsoft Store経由でなくてもコマンドプロンプト上でもインストール可能です、わざわざストアを開くのは面倒という方はそちらからどうぞ。
(初めてMicrosoft Storeを開いた気がする)
インストール後にUbuntuアプリを開くと、最初だけ初期化で少し待たされた後にユーザー名とパスワードを入れろと言ってくるので、大人しく従います。
セットアップはこれで終わりです、WSL2環境の下地がちゃんとできていれば何も難しくないです。
パッケージを最新に更新する
まあLinuxをインストールしたらどんな環境でも大体は更新を入れます。
sudo apt-get update
sudo apt-get upgrade
環境によってはここでエラーが出るかもしれませんが、その場合は/etc/resolv.confファイルのnameserverを8.8.8.8とか自身の環境のDNSサーバーを指定してあげれば上手くいくかと。
実際色んなPCで試してみたら、1台だけ更新でエラーが出てて、resolv.confを見たら訳わからん設定になってました。
ffmpeg-windows-build-helpersをgitからcloneする
ffmpegのビルドは素でやるとかなり面倒なので、ここはビルド工程をほぼ自動でやってくれるツールを使います。
これを使えば簡単なオプションを指定するだけで希望のバイナリが作成できます。
git clone https://github.com/rdp/ffmpeg-windows-build-helpers.git
cd ffmpeg-windows-build-helpers
gitからソース一式をcloneします、場所は自身のユーザーのホームディレクトリが良いと思います。
というのも、最終的に完成したバイナリを取り出す時に変な場所でビルドすると、権限の問題でWindowsから見れない場所もあるので……
ビルドに使用するパッケージをインストールする
ffmpeg-windows-build-helpersを使用する前に、ビルドで使用する必要なパッケージをインストールします。
と言っても、ffmpeg-windows-build-helpersに対して本番のコマンドを投げれば不足しているパッケージを教えてくれるので、それをそのまま入れるだけです、簡単。
time ./cross_compile_ffmpeg.sh --disable-nonfree=ntimeコマンドは時間計測したかったので付けてますが、無くても良いです。
cross_compile_ffmpeg.shのシェルがビルドを行うためのコマンドが詰まった本体ですが、様々なオプションを付けることで要件に合ったバイナリファイルを作成できます。
今回はlibfdk_aacを使いたいだけだったので、そこまでオプションは多く設定していません。
$ ./cross_compile_ffmpeg.sh -h

available option=default_value:
      --build-ffmpeg-static=y  (ffmpeg.exe, ffplay.exe and ffprobe.exe)
      --build-ffmpeg-shared=n  (ffmpeg.exe (with libavformat-x.dll, etc., ffplay.exe, ffprobe.exe and dll-files)
      --ffmpeg-git-checkout-version=[master] if you want to build a particular version of FFmpeg, ex: n3.1.1 or a specific git hash
      --ffmpeg-git-checkout=[https://github.com/FFmpeg/FFmpeg.git] if you want to clone FFmpeg from other repositories
      --ffmpeg-source-dir=[default empty] specifiy the directory of ffmpeg source code. When specified, git will not be used.
      --x265-git-checkout-version=[master] if you want to build a particular version of x265, ex: --x265-git-checkout-version=Release_3.2 or a specific git hash
      --fdk-aac-git-checkout-version= if you want to build a particular version of fdk-aac, ex: --fdk-aac-git-checkout-version=v2.0.1 or another tag
      --gcc-cpu-count=[number of cpu cores set it higher than 1 if you have multiple cores and > 1GB RAM, this speeds up initial cross compiler build. FFmpeg build uses number of cores no matter what]
      --disable-nonfree=y (set to n to include nonfree like libfdk-aac,decklink)
      --build-intel-qsv=y (set to y to include the [non windows xp compat.] qsv library and ffmpeg module. NB this not not hevc_qsv...
      --sandbox-ok=n [skip sandbox prompt if y]
      -d [meaning "defaults" skip all prompts, just build ffmpeg static with some reasonable defaults like no git updates]
      --build-libmxf=n [builds libMXF, libMXF++, writeavidmxfi.exe and writeaviddv50.exe from the BBC-Ingex project]
      --build-mp4box=n [builds MP4Box.exe from the gpac project]
      --build-mplayer=n [builds mplayer.exe and mencoder.exe]
      --build-vlc=n [builds a [rather bloated] vlc.exe]
      --build-lsw=n [builds L-Smash Works VapourSynth and AviUtl plugins]
      --build-ismindex=n [builds ffmpeg utility ismindex.exe]
      -a 'build all' builds ffmpeg, mplayer, vlc, etc. with all fixings turned on [many disabled from disuse these days]
      --build-svt-hevc=n [builds libsvt-hevc modules within ffmpeg etc.]
      --build-dvbtee=n [build dvbtee.exe a DVB profiler]
      --compiler-flavors=[multi,win32,win64,native] [default prompt, or skip if you already have one built, multi is both win32 and win64]
      --cflags=[default is -mtune=generic -O3, which works on any cpu, see README for options]
      --git-get-latest=y [do a git pull for latest code from repositories like FFmpeg--can force a rebuild if changes are detected]
      --build-x264-with-libav=n build x264.exe with bundled/included libav ffmpeg libraries within it
      --prefer-stable=y build a few libraries from releases instead of git master
      --debug Make this script  print out each line as it executes
      --enable-gpl=[y] set to n to do an lgpl build
      --build-dependencies=y [builds the ffmpeg dependencies. Disable it when the dependencies was built once and can greatly reduce build time. ]
cross_complie_ffmpeg.shに対して-hを指定すると使用できるオプションの一覧が表示されるので、目的に合ったあオプションを選んで使いましょう。
今回はdisable-nonfree=nでlibfdk_aacライブラリを含める設定だけを入れて、他はデフォルトのままでも大丈夫そうだったのでそのままです。
最初に実行すると以下の様にライブラリを入れろと言ってくるので、大人しく表示されているコマンドをそのまま使います。
Could not find the following execs (svn is actually package subversion, makeinfo is actually package texinfo if you're missing them): libtoolize cmake python clang meson bzip2 autogen gperf nasm unzip pax g++ makeinfo bison flex cvs yasm automake autoconf gcc svn make pkg-config ragel
Install the missing packages before running this script.
for ubuntu:
$ sudo apt-get update
$ sudo apt-get install subversion ragel curl texinfo g++ ed bison flex cvs yasm automake libtool autoconf gcc cmake git make pkg-config zlib1g-dev unzip pax nasm gperf autogen bzip2 autoconf-archive p7zip-full meson clang python3-distutils python-is-python3 -y
NB if you use WSL Ubuntu 20.04 you need to do an extra step: https://github.com/rdp/ffmpeg-windows-build-helpers/issues/452
足りないパッケージどころかインストールを行うためのコマンドまで表示してくれるのは親切ですね、ここまで親切なのは見たことないです。
sudo apt-get install subversion ragel curl texinfo g++ ed bison flex cvs yasm automake libtool autoconf gcc cmake git make pkg-config zlib1g-dev unzip pax nasm gperf autogen bzip2 autoconf-archive p7zip-full meson clang python3-distutils python-is-python3binfmtを無効にする
必要なパッケージのインストールが終わったら、再度ビルドコマンドを投げます。
time ./cross_compile_ffmpeg.sh --disable-nonfree=n再度エラーが出ます、今度はbinfmtという機能を無効にしろと言ってますね。
binfmtは調べた所WSL上でWindows用のバイナリ(exeファイル)を実行する為の機能らしいです、初めて知りましたがそんな事できるんですね。
(例えばWSL上でnotepad.exeを叩くとメモ帳がWindows側で起動するみたいです、話は脱線しますがこれはこれで使えそう)
windows WSL detected: you must first disable 'binfmt' by running this
      sudo bash -c 'echo 0 > /proc/sys/fs/binfmt_misc/WSLInterop'
      then try again
実際に表示されているファイルの中身を覗いてみると、確かにenabledと表示されます。
cat /proc/sys/fs/binfmt_misc/WSLInterop

enabled
interpreter /init
flags: PF
offset 0
magic 4d5a
今回はこの機能が邪魔をしているようなので、これまた表示されているコマンドで無効にしておきます。
sudo bash -c 'echo 0 > /proc/sys/fs/binfmt_misc/WSLInterop'
cat /proc/sys/fs/binfmt_misc/WSLInterop

disabled
interpreter /init
flags: PF
offset 0
magic 4d5a
無事無効になりました。
ビルドを実行する
ここまで長かったですが、いよいとビルドできる環境に整った筈なので、3回目の正直ということでまたコマンドを投げます。
time ./cross_compile_ffmpeg.sh --disable-nonfree=n以下の様に選択肢が出てくるので、今回は3のWin64 (64-bit only)を選択しておきます。
What version of MinGW-w64 would you like to build or update?
  1. Both Win32 and Win64
  2. Win32 (32-bit only)
  3. Win64 (64-bit only)
  4. Local native
  5. Exit
Input your choice [1-5]: 3
後はひたすらビルド途中のログが流れるので、気長に待ちましょう。
最終的に「Done! You will find 64-bit static non-redistributable binaries in ~」というログが最後よりも少し上で流れていたら成功です。
完成したファイルをWindowsにコピーする
このままだとまだWSL管理下のフォルダに生成されたexeファイルがありますので、適当な場所にコピーしておきます。
WSLではWindowsのエクスプローラーの左ツリーにある「Linux」の下にある「Ubuntu」のショートカットでWSL上のファイルにアクセスができます。
今回の場合だとユーザーのホームディレクトリで作業したので、\home\(ユーザー名)\ffmpeg-windows-build-helpers\sandbox\win64\ffmpeg_git_with_fdk_aacの中にffmpeg.exeが見つかると思いますので、使いやすい場所へコピーしておきましょう。
以上で作業は完了です、実際にlibfdk_aacが使えるようになっています。

